Documentation Generation Guide
These instructions will walk you through generating the Scott Project Project’s documentation and publishing it to the documentation site. You can also use these instructions to generate the Scott Project documentation on your local system.
Documentation overview
The Scott Project Project content is written using the reStructuredText markup language (.rst file extension) with Sphinx extensions, and processed using Sphinx to create a formatted stand-alone website. Developers can view this content either in its raw form as .rst markup files, or you can generate the HTML content and view it with a web browser directly on your workstation.
You can read details about reStructuredText, and Sphinx from their respective websites.
The project’s documentation contains the following items:
- ReStructuredText source files used to generate documentation found at the documentation site. All of the reStructuredText sources are found in the documentation repo.
The reStructuredText files are processed by the Sphinx documentation system, and make use of the breathe extension for including the doxygen-generated API material.
Set up the documentation working folders
You’ll need git installed to get the working folders set up:
For an Ubuntu development system use:
sudo apt-get install git
For a Fedora development system use
sudo dnf install git
We use github.io for publishing the generated documentation. Here’s the recommended local folder setup for documentation contributions and generation:
projectname/
   doc-repo/
The parent folder projectname is there to make room for the
publishing area that will come later. It’s best if the doc-repo
folder is an ssh clone of your personal fork of the upstream project
repos (though https clones work too):
Use your browser to visit the documentation repo and make a fork of the repo to your personal GitHub account.
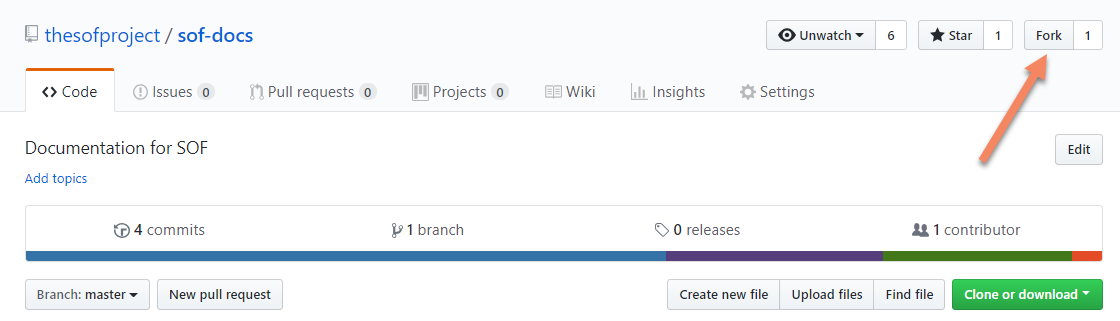
Copy the clone URL of the GitHub repo:
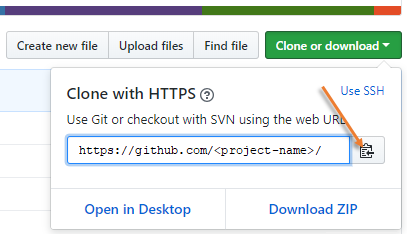
At a command prompt, create the working folder and clone the documentation repo to your local computer (and if you have publishing rights, the documentation site). If you don’t have publishing rights, you’ll still be able to generate the docs locally, but not publish them:
cd ~
mkdir project-name && cd project-name
git clone git@github.com:<github-username>/<projectname>/<documentrepo>.git
For the cloned local repos, tell git about the upstream repo:
cd doc-repo
git remote add upstream git@github.com:<projectname>/<document-repo>.git
If you haven’t done so already, be sure to configure git with your name and email address for the signed-off-by line in your commit messages:
git config --global user.name "David Developer"
git config --global user.email "david.developer@company.com"
Installing the documentation tools
Our documentation processing has been tested to run with:
- Python 3.6.3
- Doxygen version 1.8.13
- Sphinx version 1.7.5
- Breathe version 4.9.1
- docutils version 0.14
- sphinx_rtd_theme version 0.4.0
The Scott Project makes use of additional Sphinx extensions used for creating drawings:
- sphinxcontrib-plantuml
- sphinx.ext.graphviz (included with Sphinx)
Note
The plantuml extension uses Java to render the uml drawing syntax into an image. You’ll need to have a Java runtime environment (JRE) installed when generating documentation.
Depending on your Linux version, install the needed tools:
For Ubuntu use:
sudo apt-get install doxygen python3-pip python3-wheel make default-jre
For Fedora use:
sudo dnf install doxygen python3-pip python3-wheel make default-jre
And for either Linux environment, install the remaining python-based tools:
cd ~/<projectname>/doc-repo
pip3 install --user -r scripts/requirements.txt
And with that you’re ready to generate the documentation.
Documentation presentation theme
Sphinx supports easy customization of the generated documentation
appearance through the use of themes. Replace the theme files and do
another make html and the output layout and style is changed.
The read-the-docs theme is installed as part of the
requirements.txt list above.
Running the documentation processors
The doc-repo directory has all the .rst source files, extra tools, and Makefile for generating a local copy of the technical documentation.
cd ~/<projectname>/doc-repo
make html
Depending on your development system, it will take about 10 seconds to
collect and generate the HTML content. When done, you can view the HTML
output with your browser started at ~/<projectname>/doc-repo/_build/html/index.html
Publishing content
If you have merge rights to the documentation repo, you can update the public project.
You’ll need to do a one-time clone of the upstream repo (we publish directly to the upstream repo rather than to a personal forked copy):
cd ~/<projectname>
git clone git@github.com:<projectname>/<documentationrepo>.git
Then, after you’ve verified the generated HTML from make html looks
good, you can push directly to the publishing site with:
make publish
This will delete everything in the publishing repo’s latest folder (in case the new version has deleted files) and push a copy of the newly-generated HTML content directly to the GitHub pages publishing repo. The documentation site will be updated within a few minutes, so it’s best to verify the locally generated html before publishing.